Web APIs are becoming increasingly widespread in the energy sector. Historically they have been a popular technology for communicating market data (e.g. wholesale electricity prices) and grid information. Now we are seeing more and more parties adopting APIs as part of their digitalisation strategy.
This tutorial is for anyone that wants to get a better understanding of what an API does and how to build one from scratch in under an hour- all in the context of the energy sector.
For this tutorial, we are going to pretend that we are a market intelligence company that is researching trends relating to Power Purchase Agreements (PPAs). Our goal is to create and maintain an internal database of PPA deals which we can interact with via an API. The API will be simple but allows us to Create, Read, Update, and Delete data (typically referred to as a CRUD application).
To develop our API, we the going to use a popular web development framework called Express.
Express is described as “a minimal and flexible Node.js web application framework that provides a robust set of features for web and mobile applications”. Node.js is a JavaScript runtime environment built on top of Chromium’s V8 engine. It essentially enables you to run JavaScript code outside of a web browser (e.g. for building scripts, backends, APIs, etc).
There are tons of other web development frameworks that can be used, some examples include:
For this tutorial we’re going to use Express since it allows us to get up and running very, very quickly 👍
You can find all of the code we will be writing for this project on our GitHub page.
Before we start, we’re going to need a couple of things:
Go ahead and install Node.js. Once done, let’s begin by setting up our project.
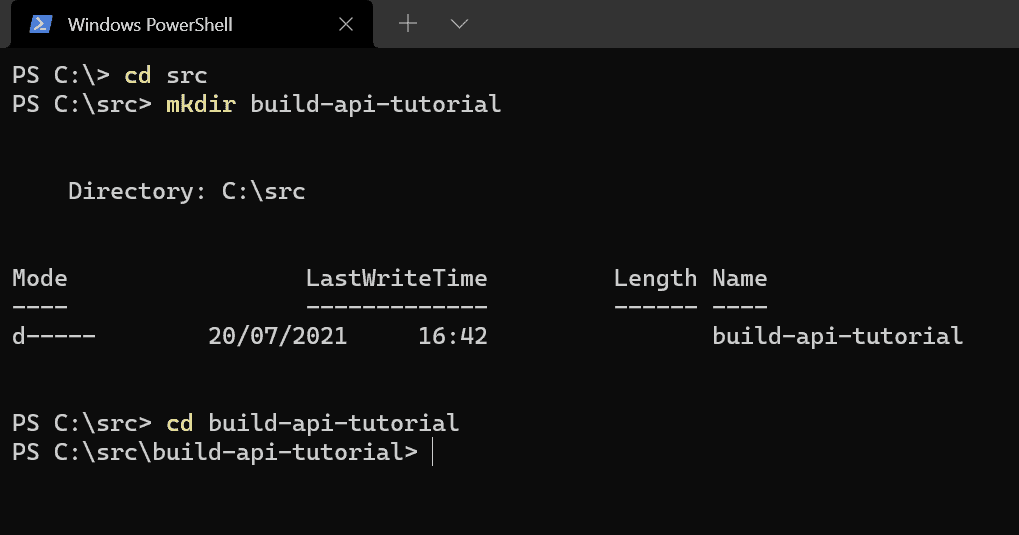
In Windows Terminal / PowerShell I’m using the command “cd PATH” to browse directories and creating a new directory using “mkdir NAME”. You don’t have to do this in a CLI of course, just create a new folder using your standard file browser. Here’s a list of CLI commands you might find useful.
Using your CLI, go to the root folder of the project. Let’s run the command “npm init”. NPM (aka node package manager) ships with Node.js out of the box and allows us to pull different packages.
You’ll be prompted to enter info relating to the project. For this tutorial we can stick with leaving things as is, hit enter/return until the prompts have cleared.

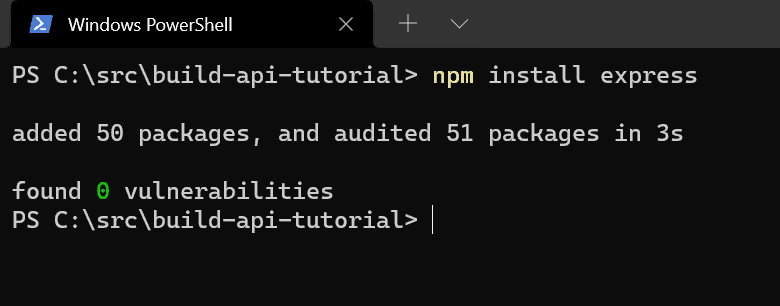
Great, you should now see a new file called package.json in the folder. The last thing we need to do before getting to the code is install express. Run the command “npm install express” in your CLI. Once installed, you should be greeted with something like:
Next create a blank “index.js” file and save it to this directory from your code editor. Your folder structure should now look like this:
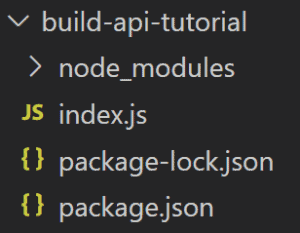
“node_modules” contains all of our external packages that we installed (including Express and its dependencies). “package-lock.json” contains a list of our dependencies and the versions locked to our project. With set-up out of the way, it’s time to get started!
To begin, we’re going to use the “Hello World” example described on the Express website. Copy and paste the following snippet into your index.js file and hit save.
					const express = require('express')
const app = express()
const port = 3000

app.get('/', (req, res) => {
  res.send('Hello World!')
})

app.listen(port, () => {
  console.log(`Example app listening at http://localhost:${port}`)
})
Go back to the CLI and type “node index.js”. This tells Node.js to run the index file containing our Express API server. You should see the following message which lets us know that the server is running locally:

Open up a browser, go to “localhost:3000” and you should be greeted with the following message:
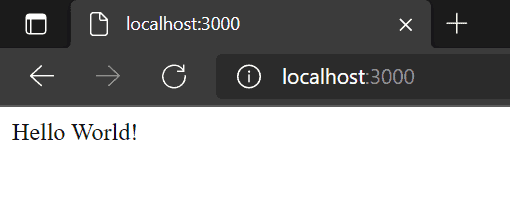
Awesome! You have just built your first web API in 11 lines of code 😎
The client/browser requests an endpoint (http://localhost:3000/), the API server receives the request, and returns a message, in this case “Hello World!”.
You can shut down the server by opening up your CLI and holding the “Ctrl” key and pressing “C”. Make sure you restart the server before trying to run any updated code.
As we are going to build an API dealing with PPA deals, it’s important to define what that data actually looks like.
PPA deals typically have the following in common:
Working with a database is outside the scope of this tutorial, so what we are going to do instead is mock one. We are going to take the key bits of information above and store the data in memory as JavaScript objects like so:
					// An example PPA deal object

{
    id: 1, // a unique identifier for this deal
    seller: 'Company X',
    buyer: 'Comany Y',
    country: 'An example country',
    technology: 'Solar, wind, etc',
    capacity: 42,
    term: 'xx years',
    date: '2021-07-21',
}
The object above is comprised of a “key” – e.g. “buyer”, “seller”, etc. And its corresponding “value” – Company Y”, “Company X”, etc.
An aside: When using actual databases, storing data as objects with key-value pairs like this exist. They are typically referred to as NoSQL-type solutions. Of course there is many different paradigms and ways of storing data. One of the most common being SQL-type databases which share a lot of similarities to the humble spreadsheet. In this type of database solution, columns represent attributes (e.g. seller, buyer, country) and rows represent each record with a corresponding set of values.
Cool, now we have a structure for how we want to store and represent data. Let’s implement it on our API.
What we will do first is mock a database by creating a variable which stores an array (or list) of our PPA deals. Each deal stored in our array will have the object structure from above.
Open up “index.js” and edit your code to the following:
					const express = require('express');

const app = express();
const port = 3000;

app.use(express.urlencoded({ extended: true }));
app.use(express.json());

 // Data array containing mock PPA deal information
let data = [
   {
     id: 1,
     seller: 'Generic Utility Co',
     buyer: 'Buyer Industries',
     country: 'Germany',
     technology: 'Solar',
     capacity: 15,
     term: '12 months',
     date: '2021-07-07',
   },
   {
     id: 2,
     seller: 'Generator X',
     buyer: 'XYZ Tech Corp',
     country: 'Belgium',
     technology: 'Offshore Wind',
     capacity: 500,
     term: '5 years',
     date: '2021-07-07',
   },
   {
     id: 3,
     seller: 'Another Power Seller',
     buyer: 'Large Corporate Co',
     country: 'France',
     technology: 'Onshore Wind',
     capacity: 50,
     term: '12 months',
     date: '2021-07-06',
   },
   {
     id: 4,
     seller: 'Generator X',
     buyer: 'Large Corporate Co',
     country: 'United Kingdom',
     technology: 'Solar',
     capacity: 20,
     term: '5 years',
     date: '2021-07-06',
   },
   {
     id: 5,
     seller: 'ABC Energy 123',
     buyer: 'XYZ Tech Corp',
     country: 'Spain',
     technology: 'Solar',
     capacity: 150,
     term: '10 years',
     date: '2021-07-05',
   },
];

// Let's print our data to console
console.log(data);

app.listen(port, () => {
   console.log(`Server listening at http://localhost:${port} ⚡`);
});
Hit save. Then let’s fire up the API by typing “node index.js” in your CLI. You should see something like this:
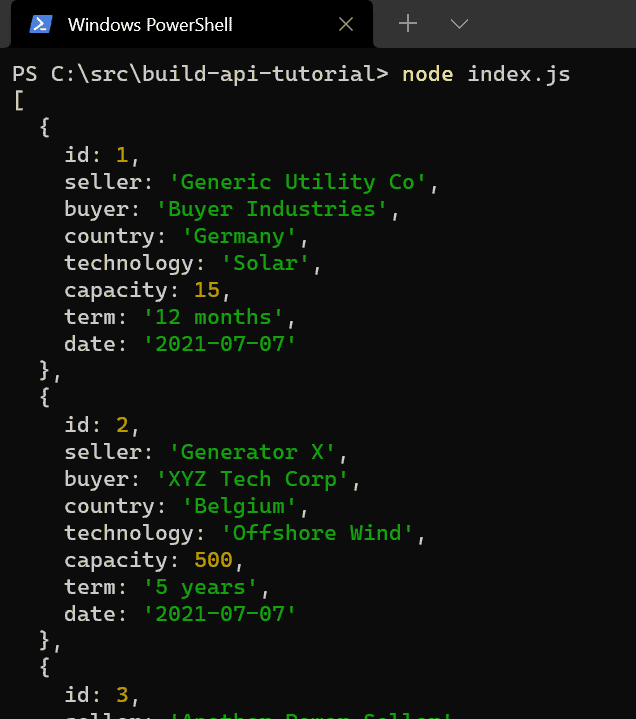
Here we are just logging/printing the data to screen to check everything is working as expected. With our “database” created, it’s time to move on to the fun part.
In designing our API, we’re going to follow RESTful standards. Microsoft have a great article on the topic if you want to learn more. For our purposes, the API we want to build has the following functionality:
Translating these requirements into API routes (or endpoints) using a REST approach would yield the following logic:
					// Get a list of PPA deals - GET "/api/deals"
app.get('/api/deals', async (req, res) => {
  // get something
});

 // Get a specific PPA deal - GET "/api/deals/{id}"
app.get('/api/deals/:id', async (req, res) => {
  // get something specific
});

// Create a new PPA deal - POST "/api/deals"
app.post('/api/deals', async (req, res) => {
  // create something
});

 // Update an existing PPA deal - PATCH "/api/deals/{id}"
app.patch('/api/deals/:id', async (req, res) => {
  // update something
});

// Delete a PPA deal - DELETE "/api/deals/{id}"
app.delete('/api/deals/:id', async (req, res) => {
  // delete something
});
Above we’re using the same function used in the “Hello World” example to define the different endpoints of our API.
These endpoints represent specific URLs that we can call on our API with various HTTP methods (e.g. GET, POST, PUT, PATCH, DELETE).
Depending on how we call the endpoint, and what variables we pass through with our request, allows the server to respond in different ways.
Let’s look at an example – update your code to the following:
					 const express = require('express');

 const app = express();
 const port = 3000;

 app.use(express.urlencoded({ extended: true }));
 app.use(express.json());

 let data = [
   {
     id: 1,
     seller: 'Generic Utility Co',
     buyer: 'Buyer Industries',
     country: 'Germany',
     technology: 'Solar',
     capacity: 15,
     term: '12 months',
     date: '2021-07-07',
   },
   {
     id: 2,
     seller: 'Generator X',
     buyer: 'XYZ Tech Corp',
     country: 'Belgium',
     technology: 'Offshore Wind',
     capacity: 500,
     term: '5 years',
     date: '2021-07-07',
   },
   {
     id: 3,
     seller: 'Another Power Seller',
     buyer: 'Large Corporate Co',
     country: 'France',
     technology: 'Onshore Wind',
     capacity: 50,
     term: '12 months',
     date: '2021-07-06',
   },
   {
     id: 4,
     seller: 'Generator X',
     buyer: 'Large Corporate Co',
     country: 'United Kingdom',
     technology: 'Solar',
     capacity: 20,
     term: '5 years',
     date: '2021-07-06',
   },
   {
     id: 5,
     seller: 'ABC Energy 123',
     buyer: 'XYZ Tech Corp',
     country: 'Spain',
     technology: 'Solar',
     capacity: 150,
     term: '10 years',
     date: '2021-07-05',
   },
 ];

 // Hello World Example Route
 app.get('/', (req, res) => {
   res.send('Hello World!');
 });

 // Get a list of PPA deals
 app.get('/api/deals', async (req, res) => {
   try {
     return res.status(200).json({ data });
   } catch (e) {
     console.log(e);
   }
 });

 app.listen(port, () => {
   console.log(`Server listening at http://localhost:${port} ⚡`);
 });
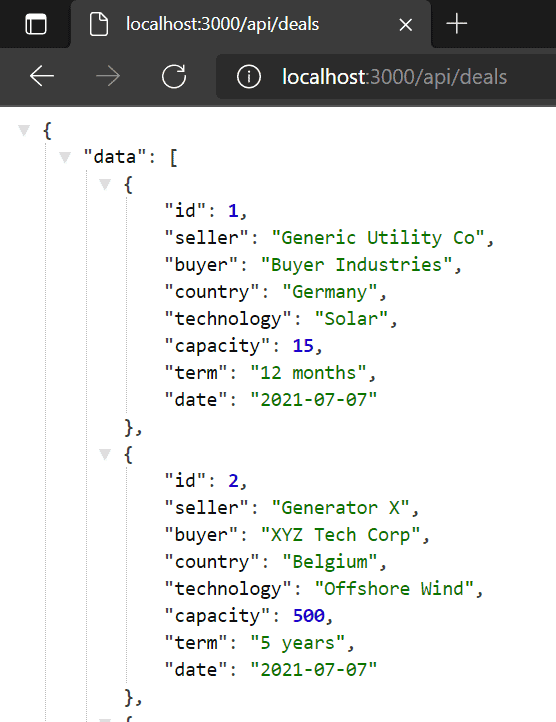
The API receives a GET request from the browser for the endpoint “/api/deals” and responds with the PPA data we defined earlier. Protip: the above might look like a mess on your browser depending on if you have a JSON formatter extension installed or not. We’re going to be using a dedicated API tool later in the tutorial so don’t worry about it if that’s the case.
Now that we have defined what we expect our API to do and the corresponding routes, it’s time to flesh out the business logic.
In general, when an API receives a request, the following takes place before an action is performed (not necessarily in this order):
Once a request has gone through the checks above, our server is then free to get down to business and deal with it.
Let’s flesh out our API by adding some basic validation logic and business logic (which deals with the “database” itself) to the endpoints described previously. Note, the coding itself is outside the scope of this article but if you would like to learn more about coding then I highly recommend freeCodeCamp as a resource. Copy and paste the final bit of code from below (or alternatively from our GitHub page) into “index.js”.
					/**
 * Set-up
 * Importing modules and configuring some settings
 */

const express = require('express');

const app = express();
const port = 3000;

app.use(express.urlencoded({ extended: true }));
app.use(express.json());

/**
 * Data
 * Normally we would fetch and store data via a database or file-system
 * For this tutorial we're keeping it simple and creating mock data in memory
 */

// Data array containing mock PPA deal information
let data = [
  {
    id: 1,
    seller: 'Generic Utility Co',
    buyer: 'Buyer Industries',
    country: 'Germany',
    technology: 'Solar',
    capacity: 15,
    term: '12 months',
    date: '2021-07-07',
  },
  {
    id: 2,
    seller: 'Generator X',
    buyer: 'XYZ Tech Corp',
    country: 'Belgium',
    technology: 'Offshore Wind',
    capacity: 500,
    term: '5 years',
    date: '2021-07-07',
  },
  {
    id: 3,
    seller: 'Another Power Seller',
    buyer: 'Large Corporate Co',
    country: 'France',
    technology: 'Onshore Wind',
    capacity: 50,
    term: '12 months',
    date: '2021-07-06',
  },
  {
    id: 4,
    seller: 'Generator X',
    buyer: 'Large Corporate Co',
    country: 'United Kingdom',
    technology: 'Solar',
    capacity: 20,
    term: '5 years',
    date: '2021-07-06',
  },
  {
    id: 5,
    seller: 'ABC Energy 123',
    buyer: 'XYZ Tech Corp',
    country: 'Spain',
    technology: 'Solar',
    capacity: 150,
    term: '10 years',
    date: '2021-07-05',
  },
];

/**
 * Services
 * These functions handle the business logic needed by the API
 */

// Validates that a specific PPA deal identifier exists
const checkDealIdExists = async (id) => {
  const check = data.filter((deal) => deal.id == id);
  if (check.length > 0) {
    return true;
  }
  return false;
};

// Helper function to filter deals based on query parameters
const filterDeals = (deal, query) => {
  if (!query) return true;
  for (const [key, value] of Object.entries(query)) {
    if (deal[key] != value) return false;
  }
  return true;
};

// Checks that incoming data has all expected properties and that they aren't empty
const validateData = async (payload) => {
  const propertiesToCheck = ['seller', 'buyer', 'country', 'technology', 'capacity', 'term', 'date'];
  for (let i = 0; i < propertiesToCheck.length; i++) {
    if (!payload.hasOwnProperty(propertiesToCheck[i]) || payload[propertiesToCheck[i]].length == 0) {
      return false;
    }
  }
  return true;
};

// Retrieve a list of deals
const getDeals = async (query) => {
  // If query parameters exist, filter the deals returned to those that match
  if (query) {
    return data.filter((deal) => filterDeals(deal, query));
  }
  return data;
};

// Retrieve a specific deal based on a deal identifier
const getDealById = async (id) => data.filter((deal) => deal.id === parseInt(id, 10));

// Create a new deal in the mock database
const createDeal = async (payload) => {
  // Find the largest id existing in table and increment by 1
  const id = data.map((deal) => deal.id).reduce((a, b) => Math.max(a, b)) + 1;
  // Create the deal based on information passed through the API
  const deal = {
    id,
    seller: payload.seller,
    buyer: payload.buyer,
    country: payload.country,
    technology: payload.technology,
    capacity: parseInt(payload.capacity, 10),
    term: payload.term,
    date: payload.date,
  };
  data.push(deal);
  return deal;
};

// Update a specific deal in the mock database
const updateDeal = async (id, payload) => {
  // Find the index of the record to update
  const index = data.findIndex((deal) => deal.id == id);
  // Update the deal based on information passed through the API
  data[index] = {
    id,
    seller: payload.seller,
    buyer: payload.buyer,
    country: payload.country,
    technology: payload.technology,
    capacity: parseInt(payload.capacity, 10),
    term: payload.term,
    date: payload.date,
  };
  return data[index];
};

// Delete a specific deal in the mock database
const deleteDeal = async (id) => {
  data = data.filter((deal) => deal.id != id);
  return data;
};

/**
 * Routes / Controllers
 * Here we describe the endpoints for the API and how they are handled
 */

// Hello World Example Route
app.get('/', (req, res) => {
  res.send('Hello World!');
});

// Get a list of PPA deals
app.get('/api/deals', async (req, res) => {
  try {
    // Retrieve a list of deals for a given query
    const deals = await getDeals(req.query);

    // Respond with the deals that matched our query
    return res.status(200).json({ data: deals });
  } catch (e) {
    console.log(e);
  }
});

// Get a specific PPA deal
app.get('/api/deals/:id', async (req, res) => {
  try {
    // Check that an ID exists in the database
    const checked = await checkDealIdExists(req.params.id);

    // Return an error if it isn't
    if (!checked) return res.status(400).json({ error: 'Could not find this id' });

    // Otherwise respond with data for this specific deal
    const deal = await getDealById(req.params.id);
    return res.status(200).json({ data: deal });
  } catch (e) {
    console.log(e);
  }
});

// Create a new PPA deal
app.post('/api/deals', async (req, res) => {
  try {
    // Check that the incoming data is valid
    const validated = await validateData(req.body);

    // Return an error if it isn't
    if (!validated) return res.status(400).json({ error: 'Empty or missing properties and/or values' });

    // Create the deal in the mock database
    const createdDeal = await createDeal(req.body);

    // Respond with the newly created deal information
    return res.status(201).json({ data: createdDeal });
  } catch (e) {
    console.log(e);
  }
});

// Update an existing PPA deal
app.patch('/api/deals/:id', async (req, res) => {
  try {
    // Check that an ID exists in the database
    const checked = await checkDealIdExists(req.params.id);

    // Return an error if it isn't
    if (!checked) return res.status(400).json({ error: 'Could not find this id' });

    // Check that the incoming data is valid
    const validated = await validateData(req.body);

    // Return an error if it isn't
    if (!validated) return res.status(400).json({ error: 'Empty or missing properties and/or values' });

    // Update the specific deal with the new information
    const deal = await updateDeal(req.params.id, req.body);

    // Respond with the updated deal information
    return res.status(200).json({ data: deal });
  } catch (e) {
    console.log(e);
  }
});

// Delete a PPA deal
app.delete('/api/deals/:id', async (req, res) => {
  try {
    // Check that an ID exists in the database
    const checked = await checkDealIdExists(req.params.id);

    // Return an error if it isn't
    if (!checked) return res.status(400).json({ error: 'Could not find this id' });

    // Delete the specified deal
    const deals = await deleteDeal(req.params.id);

    // Respond with the most up to date deal information
    return res.status(200).json({ data: deals });
  } catch (e) {
    console.log(e);
  }
});

/**
 * Start the API 🚀
 */

app.listen(port, () => {
  console.log(`Server listening at http://localhost:${port} ⚡`);
});
You will notice that there’s a fair amount of additional code! In addition to the “database” and routes we defined earlier, you will notice a bunch of new functions (services) which perform concrete actions such as validating an input or making a change to the database. Near the bottom are the routes we defined earlier, and these encapsulate the logic of how our API works. In production-grade code, this “controller” logic would typically be separated from the routes themselves – but for demo purposes this works well.
As a walkthrough example: If we look at the the “Create a new PPA deal” endpoint you can see that “/api/deals” accepts a POST request. You can see that our endpoint is expecting to receive a body of data from that request, which it is then validating using the “validateData” service. This service will check that all keys expected for the data exist (e.g. buyer, seller, technology, etc.). If it doesn’t, then the API returns an error. If the body of data is valid, then we add an entry to the database using the “createDeal” service. If that is successful, then the API responds with a message confirming that the data was inserted.
There’s a number of comments included to try and explain what each piece of code is doing. If anything is unclear please feel free to reach out or comment.
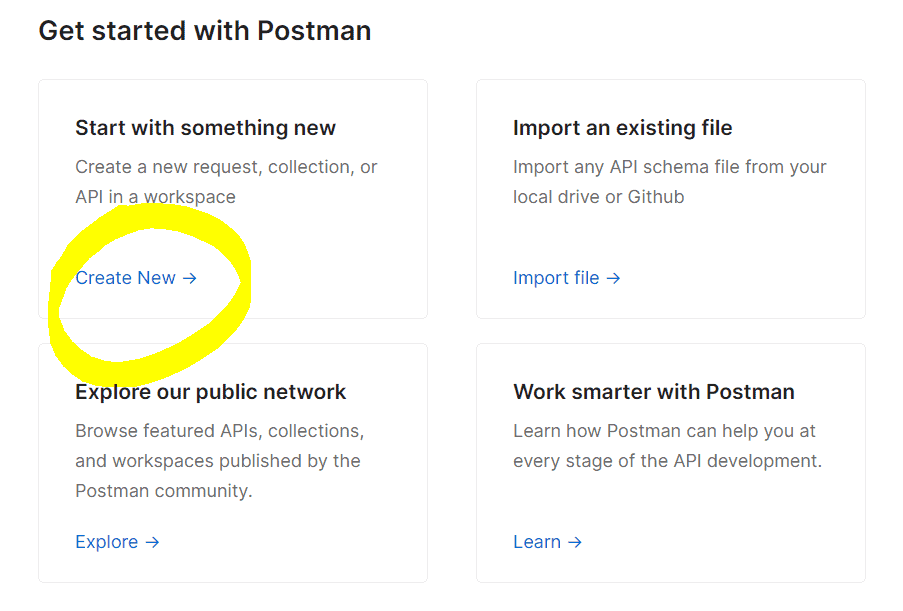
With our API built, it’s time to get testing! Boot up the server one last time (CLI -> “node index.js”). Next, we’re going to grab a popular API testing and development tool called Postman. Postman will make it super easy to test and play with our API, so head over to Postman to create an account. Once logged in, let’s create an API request.

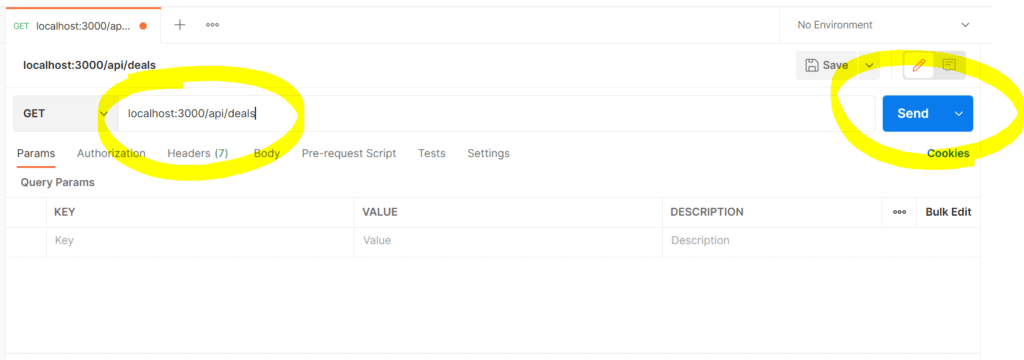
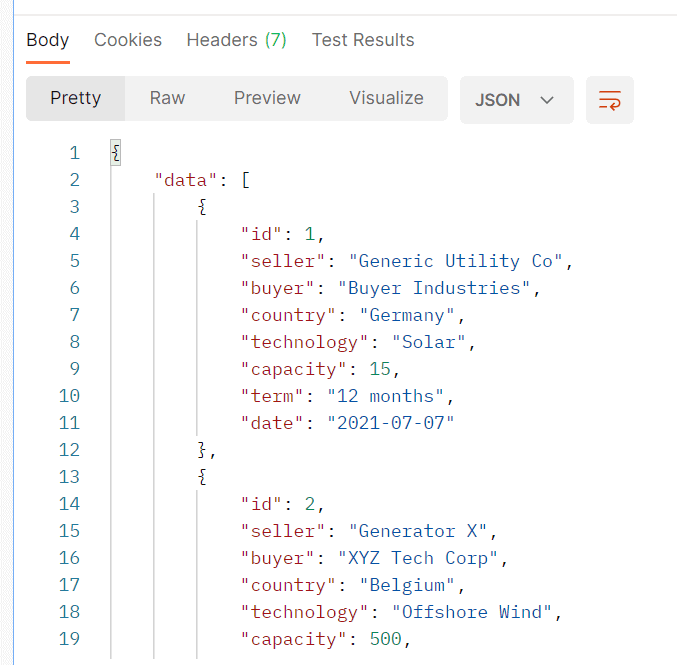
On the next screen, add “localhost:3000/api/deals” in the URL field and hit “Send”. You should see the data we defined earlier.
Great, that route seems to work! Let’s try something new, update the URL to the following and hit “Send”:
localhost:3000/api/deals?technology=Solar
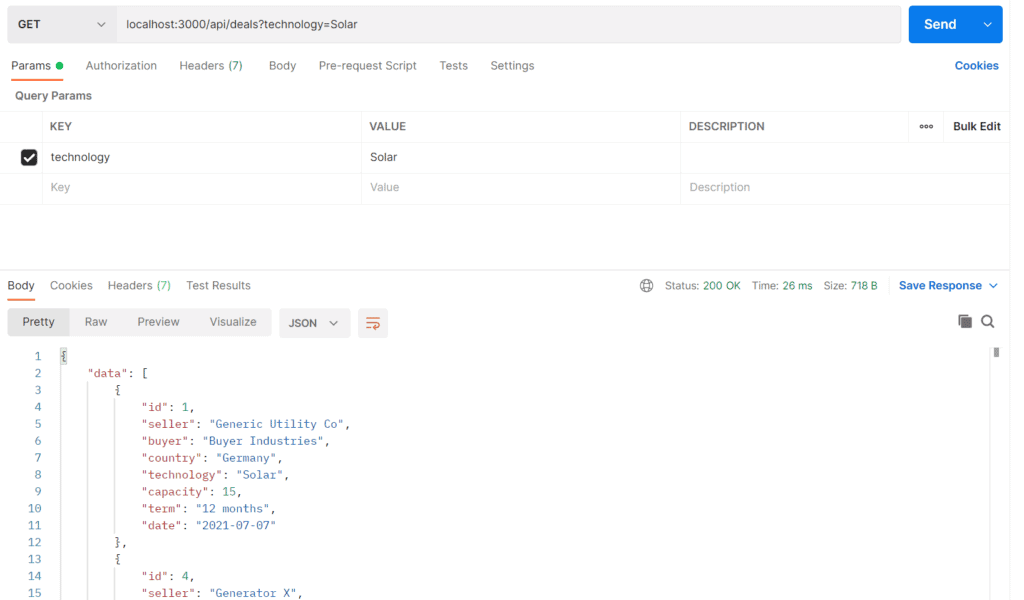
See what happened? You’ll notice that only three PPA deals were returned this time (versus the five we originally described). We have asked our API to process any “query parameters” included the URL and use these to filter the database against. The three records shown are now filtered to PPA deals using solar technology. Lets try adding another query parameter, copy and paste the following URL:
localhost:3000/api/deals?technology=Solar&country=United Kingdom
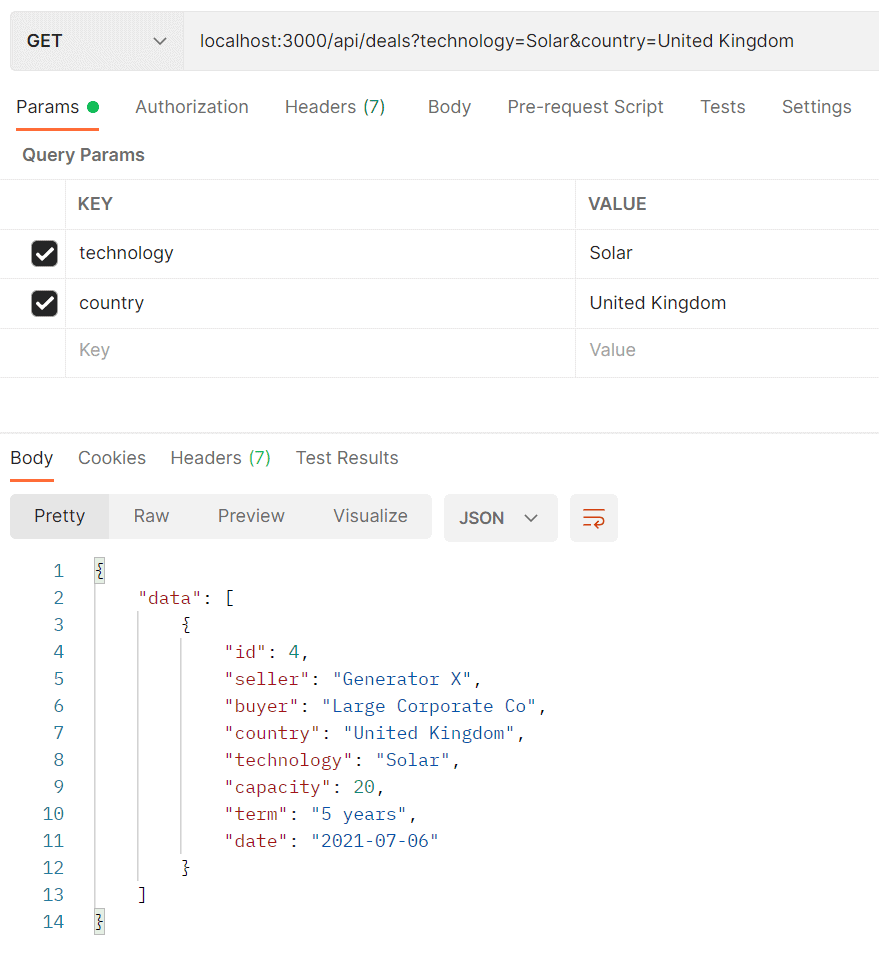
Now we only receive a single data object. A PPA deal originating in the UK with solar as the technology. This type of filter logic helps applications which deal with a large amount of records and/or fields. You can imagine that we might create a front-end app or BI dashboard which connects to this API and is able to filter results interactively.
Let’s try out some of the other routes. Copy the following and hit “Send”:
localhost:3000/api/deals/3
You will notice that only a single record which has an “id” of 3 is returned. The above is called a “route” or “template” parameter. The variable itself is included as part of the URL directly, and not constructed like a query parameter – i.e. “api/endpoint?key=value”. Let’s try a new method, this time, instead of a GET request to the URL above, let’s send a DELETE request.

Here we are instructing our API to delete the PPA record with a unique identifier equal to 3. Hit “Send”. If you call the “/api/deals” endpoint with a GET request again, you should see that only four records are now shown. We have successfully deleted a record from our database.
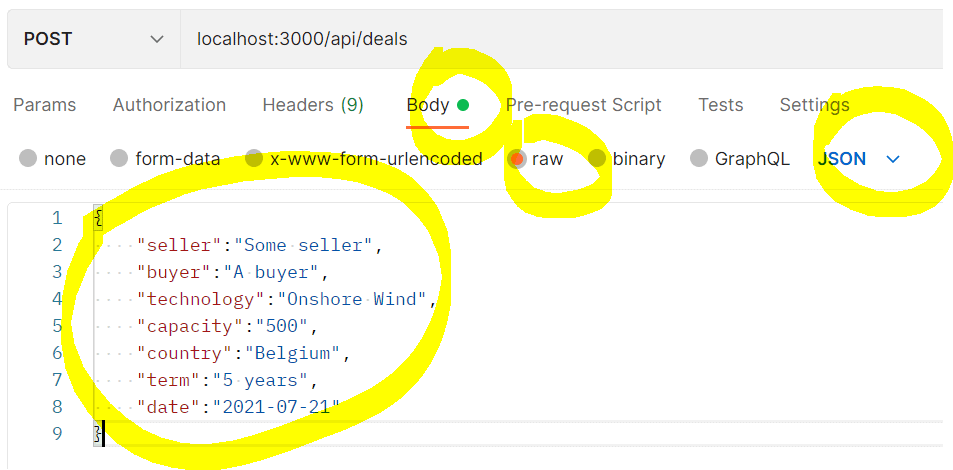
How about creating a new record? Set-up a POST request and aim it at the following route:
localhost:3000/api/deals
If you hit send now, you should see this error message:

When we’re calling this particular route, the API is expecting a request “body”. The body contains the data with which we want to create a PPA deal for. Go ahead and copy the following snippet:
					{
    "seller":"Some seller",
    "buyer":"A buyer",
    "technology":"Onshore Wind",
    "capacity":"500",
    "country":"Belgium",
    "term":"5 years",
    "date":"2021-07-21"
}
Click on the “Body” tab, click on “raw”, then update the data type to “JSON”. Paste the snippet in the box below.
When we send this request, our API is going to validate the data received, and create a new record if all checks pass. If all good, the API will respond with the new record that was created. Hit “Send” and you should receive a response with the newly created record, and a coressponding “id” field for the record. We’ve just successfully inserted data into our database, nice!

Updating a record works in much the same way as creating one, you just need to send a PATCH request to the “/api/deals/{id}” endpoint. By including “id” in the route, you’re specifying which record you would like to update. This endpoint also expects a body object similar to the one above. Give it a try!
And that concludes the testing phase. There’s a lot of other things we can do to test and improve the API, but as an introduction to the technology, we’ve covered a lot of ground.
And there you have it! In this tutorial we defined, built, and tested an API from scratch using our PPA use-case as an example. I hope the tutorial was useful in explaining a bit more about how they work and also in showcasing the power of APIs for both internal and external use. All of the code shown in this tutorial is accessible over at the re.alto Github page. Happy coding!


Winner: European Energy Data Access pilot
")


